

Wood-look porcelain tile can go over a concrete slab or a 3/4-inch plywood subfloor that is level within 1/8 inch over 10 feet, dry, sound, and clean. OSB needs plywood or self-leveling compound over it, while particleboard, vinyl, carpet, and pad should be removed. Set planks in polymer-modified thinset with about 95% coverage.
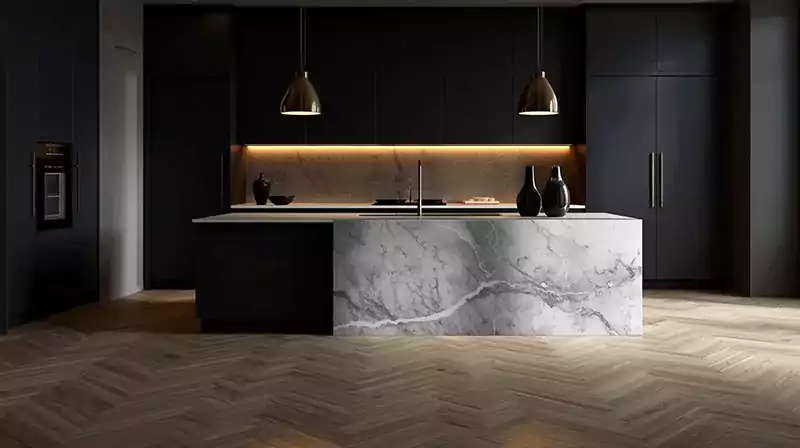
Why Tile Over What Is Already There
Usually a room that gets wet. Hardwood swells at the sink. Good porcelain absorbs under 0.5% of its weight, so a slow leak stops being the floor’s problem.
I run VividCozy, and we sell factory-direct wood-look porcelain tile, so this is how I install it on my own floors.
What You Are Actually Tiling Over
- Bare concrete slab — yes, the easiest case. 28-day cure on new work, crack repair, flatness, and moisture tests.
- Plywood subfloor — yes. Confirm 3/4″ thickness, screwed to joists every 6–8″, no soft spots, moisture under 12%.
- OSB — I would not. Cover with 3/4″ exterior plywood glued and screwed, or pour self-leveling compound.
- Particleboard — no. Pull it out; it fails under tile, however carefully it goes down.
- Existing ceramic tile — sometimes. Only if the tile is firmly bonded, uncracked, and level; otherwise, pull it or cover it with self-leveling compound and a membrane.
- Sheet vinyl, VCT, carpet, or pad — no. Pull it all: the adhesive traps moisture, the tile moves, and the tack strips leave a trip edge.
The Subfloor Checklist: Level, Dry, Sound, Clean
- Level — An 8-foot level should read within 1/8 inch at the ends; manufacturers want it flat within 1/8 inch over 10 feet, and I tighten that to 1/16 inch for long planks. Check with a 6-foot straightedge—over 1/8 inch in 10 feet means self-leveling compound, not troweled thinset.
- Dry — On concrete, stay under 75% RH on a meter, or under 8 pounds per 1,000 square feet with a calcium chloride test that sits 60 to 72 hours. On wood, a pin meter is under 12%.
- Sound — A hollow thump over concrete is delamination; repair it first. Squeaks mean the plywood is not fastened to the joists; fix from below with screws or construction adhesive.
- Clean — No paint, sealer, wax, or drywall dust. Vacuum and wipe with a damp cloth; a sealed slab needs grinding.
Leave a 1/4-inch gap all around the perimeter, and do not grout it—that is the expansion allowance.
Getting The Old Floor Up
Pull the carpet and pad, every staple, and the tack strips.
Peel up the sheet vinyl or VCT if it will lift, then deal with what it leaves behind.
- Water-based adhesive — from the last thirty years scrapes off with a floor scraper and a razor blade.
- Rubber-based adhesive — leaves a black smear that takes a mastic remover and a long scrub.
- Asphalt-based mastic — black tar adhesive from the 1970s and 80s—comes off mechanically, and at that age there is a real chance of asbestos: test before disturbing it, and do not sand it. What stays needs a blocking primer or self-leveling compound over it.
Patch any concrete that came up with the vinyl, and let it cure.
Layout On Paper Before You Mix Anything
Strike two perpendicular reference lines through the focal point of the room, usually the door you face walking in, then dry-lay two rows with spacers. A half-inch gap at the wall shows how the pattern terminates.
- Stagger plank formats a third or a half off — Herringbone, chevron, and parquetry repeat in modules—do that arithmetic on paper first.
- Send cuts to the edges nobody looks at — the vanity, the focal wall.
- Buy 10% overage for a straight layout, 15% for herringbone or chevron.
- Undercut the door jambs with a jamb saw so the tile slides under the door.
- Cut with a wet saw and a continuous-rim diamond blade, face side up for visible edges.
Setting the Tile
On wood, use a polymer-modified thinset rated for wood substrates. Never drywall compound, and never bond tile to particleboard. On a concrete slab in a wet room, roll out a sheet membrane or liquid-applied waterproofing before the thinset.
Use a 1/2″x1/2″ notched trowel for plank formats, and check coverage by lifting a tile after a few rows. Back-butter each tile with a flat trowel; large format wants around 95% coverage or better.
Spacers set the joint: 1/16 inch for the tight plank look, 1/8 inch if the tile is not perfectly rectilinear, and check the manufacturer’s spec. Match grout to the tile’s average tone, and use clips to pull plank edges onto one plane.
Press the tile down with a grout float and a rubber mallet, then put weight on it—tile boxes or a sand-filled five-gallon bucket. Keep foot traffic off for 24 hours and follow the cure time on the bag.
Grout and Edges
Do not grout until the thinset has cured: 24 hours for standard work, 72 for large format, or a heavy grout load.
- Cement-based (sanded) for most floors and joints of 1/8 inch or more.
- Premixed cement for warm rooms and long grout days; it does not set up in the bucket.
- Unsanded cement for 1/16 inch joints, where sanded grout will not fit.
- Epoxy for a backsplash behind the range, where grease hits daily—stainproof, unforgiving of timing, so work in small batches.
Silicone, not grout, at every change of plane: where the wall meets the floor, in shower pan corners, and around the drain.
Grout diagonally, do not over-wipe, let the haze dry for about 20 minutes, then buff it off dry.
Where tile meets another floor, use a transition strip: 0.39″ porcelain next to 0.16″–0.20″. SPC is roughly a 1/4 inch step, so use a reducer.
What Goes Wrong, and What to Fix
| What You See | Fix |
|---|---|
| Tiles tenting or buckling months later | Water under the tile, green thinset, or no perimeter gap: stop the water, dry it out, pull the tiles, and fix it. |
| One plank edge above its neighbor | Out-of-flat substrate, small trowel notch, or no clips: re-bed it or grind the high spot. |
| Cracked tiles | Cut off the score line, too tight at the wall, a dropped box, or a point load: replace it. |
| Hollow when you knock | Thin coverage: re-bed the hollow spots. |
| Grout crumbling | Joint too narrow for sanded grout, grouted too early, traffic too soon: regrout. |
| Haze that will not come off | Left too long or a matte surface: use a matte-safe haze remover, tested in a corner. |
DIY or Hire Somebody?
For a 100-square-foot bathroom, roughly:
- Material — from $9 per square foot for wood-look porcelain.
- Consumables — thinset, grout, spacers, clips, membrane—$200 to $350.
- Tools — wet saw, trowels, mixer, level—$250 to $500 if you don’t own them.
- Labor, hired out — roughly $5 to $12 per square foot, with demolition often a separate line. Rates vary; get three quotes.
That room lands around $1,300 to $1,700 in materials if you own the tools or $1,800 to $2,500 with a contractor. Without the tools, a contractor is cheaper for one small room; for a whole floor plus a bathroom, DIY makes sense.
Hire out for shower pan waterproofing, stairs, herringbone across a large room, or a house that must be habitable in three days.
Order Samples Before the Floor
Before you buy a box, order VividCozy’s flooring sample pack—four samples for $5.99, refundable or credited toward your order. Carry them into the actual room: grain that reads warm in the morning can read gray under north light at night.
Check texture under a damp fingertip for grip and thickness (0.39″ porcelain).
Standard shipping is free within the contiguous 48 states — full-size tile orders ship by factory sea freight (0-48 days), select vinyl and sample kits by domestic warehouse (0-13 days), with an optional express upgrade at +35%. We stand behind a money-back guarantee.
FAQs: Installing Wood-Look Porcelain Tile Over a Subfloor
Can you install wood-look porcelain tile over an existing subfloor?
Yes, if the base is a concrete slab or 3/4-inch plywood screwed to the joists every 6–8 inches, with no soft spots and moisture under 12%. OSB needs a layer of glued-and-screwed exterior plywood or self-leveling compound on top, and particleboard should be pulled out entirely.
How flat does a subfloor need to be for plank tile?
Aim for no more than 1/8 inch of variation over 10 feet, and tighten that to 1/16 inch for long planks. If the floor is further out than that, use self-leveling compound rather than trying to fix it with thick thinset.
Can you tile over old vinyl, carpet, or ceramic tile?
Carpet, pad, sheet vinyl, and VCT should all come up because they trap moisture and let the tile move. Existing ceramic can stay only if it is firmly bonded, uncracked, and level. If you find black asphalt-based mastic from the 1970s or 80s, test it for asbestos before disturbing it.
What thinset, trowel, and grout work best for wood-look porcelain?
Use a polymer-modified thinset (rated for wood if that is your subfloor) and a 1/2″ x 1/2″ notched trowel, back-buttering each plank for roughly 95% coverage. Choose sanded grout for joints of 1/8 inch or more and unsanded for 1/16 inch, and wait at least 24 hours (72 for large format) before grouting.
Is it cheaper to DIY or hire a pro for a wood-look tile floor?
For a 100-square-foot bathroom, materials run about $1,300–$1,700 if you already own the tools or $1,800–$2,500 with a contractor. A pro is usually cheaper for one small room if you would have to buy tools, and it’s worth hiring a pro regardless for shower pan waterproofing, stairs, or herringbone across a large space.
