

The best awning placement starts with mapping your “living zone”—where people actually sit, walk, and gather—then adjusting for sun direction, wind exposure, and drip line runoff. West-facing patios need deeper projection for late-day sun, decks require clearance for door swings and stair landings, windows should be prioritized by glare and heat exposure, and doorways need coverage that extends past the threshold to the first step. Mounting should always land on solid framing, not decorative trim.
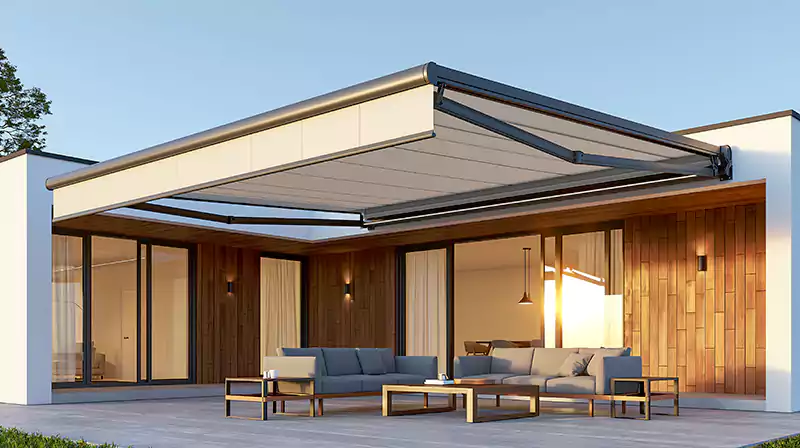
If you are thinking about adding shade to your outdoor spaces, placement matters as much as product choice. A well-planned awning installation can make a patio more usable, keep a deck cooler, reduce glare through windows, and give you a drier, safer entry at doorways. A poorly placed awning, on the other hand, can fight the sun at the wrong time of day, catch too much wind, or interfere with doors, railings, and drainage. The good news is that most placement problems are avoidable with a little upfront planning.
Below are practical, homeowner-friendly placement tips for patios, decks, windows, and doorways, written for real-world homes and real-world weather.
Start with the “why” for each spot
Before measuring anything, get clear on what you want the awning to do in that specific location. Different goals change the best placement.
Common goals include:
- Comfort: reduce heat and direct sun on seating areas
- Protection: keep rain off grills, furniture, and entry steps
- Energy help: reduce solar heat gain through windows
- Use more hours: make outdoor spaces comfortable earlier and later in the day
- Safety: reduce slippery steps and puddling near doors
Write down the main goal for each area. If you try to solve everything with one awning, placement often becomes a compromise.
Understand sun direction before you pick a location
Sun direction is the most overlooked placement factor. Two homes on the same street can have totally different needs depending on orientation, tree cover, and how the yard is laid out.
Quick rules of thumb:
- West-facing exposures: often need the most help with late-day heat and glare.
- South-facing exposures: get steady sun and can benefit from deeper shade coverage.
- East-facing exposures: get morning sun, which some homeowners enjoy. Shade may be more about glare at breakfast time than midday heat.
- North-facing exposures: usually need less sun control but may still benefit from rain protection.
Simple way to evaluate: stand where you want shade at three times—morning, midday, and late afternoon—and note where the sun hits your eyes, table, or door threshold. Do this on a clear day if possible.
Wind and weather come next
Awnings are shade structures, so wind matters. Even if you love the idea of a big projection for maximum coverage, a very deep awning in a wind-prone corner can become a headache.
Placement tips for wind:
- Look for sheltered walls protected by the home’s shape, nearby fences, or landscaping.
- Avoid placing large awnings where wind tunnels form, such as between the house and a detached garage or along a narrow side yard.
- If your outdoor area is exposed, placement may favor a slightly smaller projection, higher mounting, or a retractable option that can be pulled in during storms.
Also consider rainfall patterns. You want water to run away from the home and from walking paths, not to drip directly onto steps or pool at the patio edge.
Structural mounting: choose the strongest “anchor” wall area
Where you mount is not just a convenience decision. It is a structural one.
General placement guidance:
- Awnings should be mounted to solid framing or a structurally appropriate substrate, not just decorative trim.
- Mounting too high can reduce shade effectiveness. Mounting too low can block door swings and sightlines.
- If the exterior has thick trim, brick veneer, or uneven siding profiles, placement may need adjustment so the awning sits properly and seals cleanly.
If you are planning an awning near gutters, downspouts, or exterior lighting, note those obstacles early. Small conflicts can force awkward placement later.
Placement Tips by Area
Patio awning placement: prioritize the “living zone”
A patio is often the most used outdoor area, so it is a common place for an awning. The key is shading where people actually sit and move, not just shading a portion of the slab.
A: Map your furniture layout first: Set up (or sketch) the table, chairs, grill, and walking lanes. The best awning placement usually centers over:
- seating
- dining area
- the main path from door to seating
If you shade only the back door area, you may still end up with the table in full sun.
B: Consider projection depth and the sun angle: Awnings create shade based on angle. If the sun is lower in late afternoon, you may need more projection to keep shade where you want it. This is especially true on west-facing patios.
C: Leave room for airflow and heat release: Placing an awning too tight to a wall or directly above a grill area can trap heat. Keep grilling zones slightly outside the main covered area if possible, or ensure there is enough open space for ventilation.
D: Watch where the drip line lands: If the awning edge drips right onto the patio seating edge, you get a “wet ring” exactly where you want to stand. Ideally, the front edge drip line falls:
- away from door thresholds
- away from main seating
- onto an area that can handle water without pooling
If you have a slope or drainage issue, placement can help. For example, shifting the awning slightly can move drip away from the lowest spot.
Deck awning placement: think about railings, doors, and height
Decks add extra constraints because of railings, stairs, and elevated height. Placement is about clearance as much as coverage.
A: Confirm door swing and traffic flow: For decks with a patio door, confirm:
- The door fully opens without hitting awning arms or supports
- You still have a comfortable path from the door to the stairs and seating
It is easy to place an awning that looks centered from the yard but interferes with day-to-day movement on the deck.
B: Mounting height affects both shade and headroom: A higher mount can provide better headroom, especially on an elevated deck. But if you mount too high, you may lose shade effectiveness, particularly in the afternoon when sun angles change.
A good placement balances:
- enough clearance for people walking near the wall
- enough slope for water run-off (if applicable)
- enough coverage for seating, not just the doorway
C: Be careful near deck stair landings: If the awning covers stairs, placement should avoid creating a drip line right onto the stair tread area. Wet stairs are a real slip hazard. Often, the best approach is to cover the deck platform but leave stairs mostly uncovered, or adjust the placement so drip falls away from the stair run.
D: Account for railing height and sightlines: On a deck, you may be seated higher relative to the yard. An awning mounted too low can block the view. If you care about the view, placement can shift slightly higher or use a style that feels less visually heavy.
Window awning placement: shade the glass, not the trim
Window awnings are often installed for glare control, UV protection, and comfort. They can also protect window frames and reduce weather exposure. Placement should be precise so it works well and looks intentional.
A: Choose windows that actually need shading: Not every window benefits equally. Prioritize:
- west-facing windows that get harsh late-day sun
- large windows where glare impacts TV screens or office desks
- rooms that overheat despite normal ventilation
Placing awnings on every window can be visually busy. Strategic placement often delivers the same comfort improvement.
B: Size for coverage, not decoration: A window awning should extend enough to shade the glass at the times you need it. If it only shades the top few inches, it may not reduce glare much.
C: Mind clearance above and around the window: Placement must account for:
- trim profiles
- shutters
- exterior lights
- downspouts
- vents
Make sure the awning does not block required vents or interfere with window operation, especially for windows that crank outward.
D: Consider privacy and view: A window awning can change how much sky you see. For some homeowners that is a plus. For others it feels closed in. Placement and style choice can reduce that effect, especially on front-facing windows.
Doorway awning placement: prioritize water control and safe footing
Entryways benefit from awnings for a simple reason: water and snow at the threshold create inconvenience and risk.
A: Cover the threshold and the first step: The ideal placement provides protection where it matters:
- the door threshold
- the lock and handle area
- the step where you pause to unlock the door
If the awning only covers the door but not the landing, you still end up standing in rain.
B: Confirm headroom and door hardware clearance: For doorways, placement must avoid conflicts with:
- storm doors
- outward-swinging doors
- decorative light fixtures
- house numbers and doorbells
You should be able to open the door fully and stand comfortably under the awning without ducking.
C: Manage dripping and runoff: A doorway awning that dumps water directly onto a small landing is not an upgrade. Placement should aim to shed runoff away from the main standing area. If your entry has limited space, consider how gutters and downspouts nearby affect water movement.
D: Think about snow and ice: In colder climates, placement should avoid creating melt-and-refreeze zones on steps. An awning can help, but only if it actually reduces water on the treads.
Details that affect placement in every situation
Clearance for accessories
If you plan to add:
- lighting
- ceiling fans (in covered patio areas)
- motorized controls
- screens or drop shades
Then placement has to accommodate wiring routes and hardware. Even if you do not install accessories right away, it is worth planning for them now so you do not have to relocate the awning later.
Neighborhood rules and permits
Some areas have setback rules, HOA design guidelines, or permit requirements for structures that project from the home. Placement that extends into a setback or crosses a property line boundary can create headaches. A quick check can prevent a redesign.
Visual balance and curb appeal
Awnings are functional, but they are also visible. Placement that lines up with architectural elements tends to look best; for example:
- centered over a door
- aligned with window groupings
- consistent height across similar openings
This is one reason it helps to step back and view the home from the street before finalizing placement.
A simple pre-install placement checklist
Before you finalize where an awning will go, walk through this list:
- What problem is this awning solving at this location?
- When does the sun hit this spot most intensely?
- Is the area exposed to strong wind or weather?
- Where will the water drip, and will it pool anywhere?
- Will doors open fully without interference?
- Will the awning block views or feel too low overhead?
- Are there lights, vents, downspouts, or trim conflicts?
- Does the mounting surface provide solid support?
- Are there HOA or permit considerations?
- Does the placement look aligned with the home’s architecture?
Final thought: the “best” placement is the one you will use
The most successful awning setups are the ones that match how a household actually lives. Shade over the seating area you use daily beats a perfectly centered awning over a space you rarely occupy. Start with the function, confirm the structure, and then fine-tune the visual alignment.
