

To plan a kitchen remodel, start by defining your needs and setting a budget with a 10% to 20% contingency. Next, measure the space and finalize the layout, choose materials and appliances, and hire a licensed contractor. Then secure permits, order cabinets and appliances before demolition, set up a temporary kitchen, and finish with a punch-list walkthrough before the final payment.
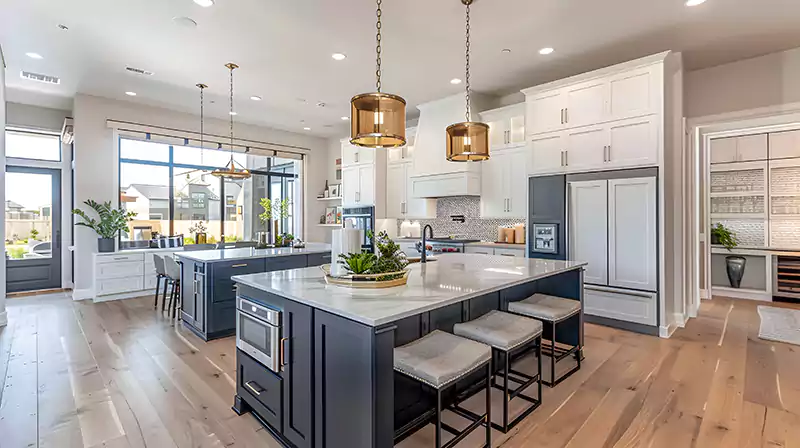
A kitchen remodel is one of the biggest projects most homeowners take on. It costs real money, takes weeks or months, and turns daily life upside down while it’s happening. But it’s also one of the most useful upgrades you can make. A good kitchen works better, looks better, and can add value when you sell. The difference between a smooth remodel and a stressful one usually comes down to planning. People who rush into demos often end up over budget, waiting on late cabinets, or living with choices they regret. People who plan first tend to finish closer to their budget and timeline.
This guide walks through each step in order, from setting goals and a budget to the final walkthrough. It covers layout, materials, hiring, permits, and how to live through the work. Use it as a checklist before you call a contractor or buy a single tile.
Step 1: Figure Out What You Actually Need
Before you look at a single cabinet, ask why you’re remodeling. The answer shapes every choice that follows.
Start with what bugs you about your current kitchen. Write it down. Common complaints include:
- Not enough counter space
- Too little storage
- A cramped or awkward layout
- Old or failing appliances
- Poor lighting
- A dated look
Then think about how you use the room. Do you cook every night or mostly reheat? Do kids do homework at the counter? Do you host big dinners? A kitchen for a serious home cook needs different things than one for a busy family that eats out a lot.
Finally, decide how long you plan to stay in the house. If you’re selling in two years, keep choices simple and broadly appealing. If this is your forever home, build it around your habits.
Step 2: Set a Budget You Can Stick To
Decide on a number before you start shopping. It’s all too common to fall in love with a $6,000 range and then find there’s nothing left for cabinets.
Costs vary a lot by region, kitchen size, and finish level. A cosmetic refresh with new paint, hardware, and counters costs far less than a full gut job that moves walls and plumbing. Get a few rough quotes early so your estimate reflects actual prices in your area.
Once you have a total, split it up. Cabinets are usually the biggest single cost, often around a third of the budget. Labor, appliances, and countertops come next. Flooring, lighting, plumbing fixtures, and backsplash make up the rest.
And always set aside 10% to 20% for surprises. Once walls come down, contractors often find old wiring, water damage, or rotted subfloor. If you don’t use the cushion, that’s fine. But plan as if you will need it.
Step 3: Measure the Space and Plan the Layout
Good layout matters more than fancy finishes. A beautiful kitchen that’s difficult to move around in will frustrate you every day.
Measure the room carefully, including windows, doors, outlets, vents, and plumbing. Note the ceiling height too. These details limit what fits and where.
Most kitchens use one of these basic layouts:
- Galley: two parallel counters, good for small spaces
- L-shape: counters on two walls, open on the other sides
- U-shape: counters on three walls, lots of storage
- Island: an L or U with a central island for prep or seating
Think about the work triangle, the path between the sink, stove, and fridge. These three should be close enough to move between easily, but not so tight that two people bump into each other.
Keeping the sink, stove, and dishwasher where they are now saves a lot of money. Moving plumbing and gas lines is one of the quickest ways to overspend.
Step 4: Choose Materials and Appliances
Now comes the fun part. But keep your budget and daily use in mind with every pick.
- Cabinets: Stock cabinets are cheapest and fastest. Semi-custom gives more sizes and finishes. Custom costs the most but fits any space.
- Countertops: Quartz is low-maintenance and doesn’t need sealing. Granite is durable and natural but needs occasional sealing. Laminate costs less and has improved a lot.
- Flooring: Porcelain tile and luxury vinyl plank both handle spills and heavy traffic well.
- Appliances: Pick these before finalizing cabinets, since sizes affect the layout. Look for ENERGY STAR models to cut power bills.
- Lighting: Plan for three layers: overhead lights, task lights under cabinets, and accent or pendant lights.
See materials in person before you buy. A countertop sample under store lights can look completely unique in your kitchen. Bring samples home and look at them in morning and evening light.
Step 5: Hire the Right Team
Unless you’re doing a small cosmetic update yourself, you’ll need help. Most kitchen remodels involve a general contractor, and some also use a kitchen designer.
Get at least three written quotes. Make sure each one covers the same scope, so you’re comparing fairly. Then verify each contractor carefully:
- Confirm they hold a valid state license and insurance.
- Read recent reviews and ask for references from past kitchen jobs.
- Look at photos of finished projects similar to yours.
- Ask who pulls permits and who handles inspections.
- Get a written contract with a payment schedule tied to finished work.
Be wary of anyone who wants most of the money upfront or pushes you to sign fast.
For homeowners in Broward County, searching for kitchen remodeling fort lauderdale will bring up many options. Narrow the list by checking licenses through Florida’s DBPR website and asking how many kitchens they’ve finished in the past year.
Step 6: Sort Out Permits and Codes
Many homeowners skip this step, and it can cost them later. Most remodels that touch electrical, plumbing, gas, or walls need a permit. Unpermitted work can cause trouble with insurance claims and when you sell.
Rules vary by city and county. In general, you’ll likely need a permit for:
- New or moved electrical circuits and outlets
- Moving or adding plumbing lines
- Gas line work for a new range
- Removing or changing walls
- Replacing windows or exterior doors
Simple swaps, like new cabinet doors or a faucet in the same spot, usually don’t need one. But always check with your local building department.
If you live in a condo, you may also need approval from your association before work starts. Anyone planning kitchen remodeling hollywood fl projects should ask their contractor to confirm both city permit needs and any HOA or condo rules upfront. These approvals can add weeks, so start early.
Step 7: Order Early and Build a Timeline
Delays usually come from materials, not labor. Custom cabinets can take several weeks or more to arrive. Some appliances and special-order tile can take just as long.
Order the big items before the demo starts. Ideally, cabinets and appliances should be on site or confirmed for delivery before your old kitchen comes out. That way, you’re not stuck without a kitchen while you wait on a shipment.
Work with your contractor on a written timeline. A typical order of work looks like this:
- Demolition
- Rough plumbing and electrical
- Inspections
- Drywall and paint
- Flooring
- Cabinet installation
- Countertop measuring and installation
- Backsplash, fixtures, and appliances
- Final inspection
Countertops can’t be measured until cabinets are in, and fabrication can take a week or two after that. Please include that gap in your plan.
Step 8: Prepare Your Home and Set Up a Temporary Kitchen
You’ll likely be without a working kitchen for several weeks. A little setup makes that much easier.
- Empty all cabinets and drawers. Donate what you don’t use.
- Pick a spare room, garage, or dining area for a temporary kitchen.
- Set up a microwave, coffee maker, toaster oven, or air fryer, and a mini fridge if you have one.
- Use paper plates or a plastic tub for washing dishes in a bathroom sink.
- Plan simple meals and budget for some takeout.
- Protect nearby rooms with plastic sheeting to keep dust down.
Talk to your contractor about work hours, where workers will park, and which entrance they’ll use. If you have pets or small kids, plan how to keep them safely away from the work area.
Step 9: Stay Involved Through Construction and the Final Walkthrough
Once work starts, stay in touch without hovering. A short check-in every few days is enough. Ask questions early. A small adjustment during framing is cheap. The same adjustment after cabinets are in is not possible.
Put every change in writing. Change orders are normal, but they add cost and time. Please be sure to see the price before you agree.
Near the end, do a careful walkthrough with your contractor. Make a punch list of anything that isn’t right, like
- Doors or drawers that don’t close smoothly
- Scratches, chips, or gaps in caulk
- Outlets or lights that don’t work
- Leaks under the sink
- Uneven grout or loose tiles
Don’t make the final payment until the punch list is done and the final inspection has passed. Keep all warranties, manuals, and receipts in one folder.
Mistakes That Cost Homeowners the Most
Most remodel regrets come from a short list of avoidable errors:
- No contingency fund: Surprises happen in almost every remodel.
- Picking looks over function: A trendy finish that’s difficult to clean gets old fast.
- Too few outlets: Plan for small appliances, chargers, and an outlet in the island.
- Skimping on storage: Deep drawers and pull-outs often beat extra upper cabinets.
- Poor lighting: One ceiling fixture isn’t enough for safe prep work.
- Changing your mind mid-project: Every change adds cost and delay.
- Hiring on price alone: The cheapest bid often leads to the most problems.
Final Thoughts
A kitchen remodel doesn’t have to be chaos. Most of the stress comes from decisions made too late or in a rush. So do the hard thinking upfront. Know your goals, set a real budget with a cushion, lock in your layout, and choose your materials before demo day.
Then hire a licensed contractor you trust, get your permits in order, and order early. Follow these steps in order, and you’ll spend less time fixing problems and more time enjoying a kitchen that fits the way you live.
